Showing posts with label serger. Show all posts

Tuesday, April 29, 2014

A Memorial Quilt for Bryant

Bryant, a friend of my brother and sister-in-law,  passed away suddenly a few days before Christmas 2013.  Bryant was in his mid 40s and his death, of course, was devastating to family and friends. While most folks were doing last minute Christmas shopping on Christmas Eve, Bryant's family members were shopping for funeral attire.  My SIL, who is best friends with Bryant's mother, wanted to present her with a quilt in memory of her son.

I'd not had the pleasure of knowing Bryant, but was honored to get to know him while my SIL and I worked together planning the quilt. Our final decision was a t-shirt quilt that was to include pictures of Bryant and his two lovely daughters along with various t-shirts that Bryant favored. 

It happened that my mother came for a two week visit in March and the plans were for her to bring the finished quilt back with her to give to my SIL. While Mother was here we had loads of fun attending the Greater Atlanta Quilt Shop Hop, planning my indoor hydroponic garden plus we were able to work on and finish Bryant's Quilt. We both had a marvelous time working side by side as the quilt came together. Most importantly we had quality mother-daughter time that will always be remembered and cherished by me,  just as Bryant's family will always remember and cherish him. 

Quilting is suitable for all life events and even though Bryant's Quilt was made because of a sad life event, its making created happy moments of laughter and fellowship that my Mother and I shared together...moments that I will always remember. And even though I did not know  Bryant, I thank him for the happy life event that was shared with my mother by making this quilt. Even in death one can still bring joy to those left behind. 

Bryant's Quilt

As of this photo the borders still need to be added. We used batiks for the sashing and the quilt borders.

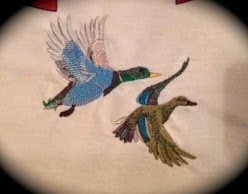
He enjoyed outdoor sports so I embroidered designs on a couple of the shirts.


It's difficult to see in this photo, but two of the t-shirts had pockets in which I embroidered a heart and a fancy design on the fabric.  Since the pocket of a t-shirt covers the human heart, love ones can put their hand in the pocket for a few minutes and dwell between the hearts. 


I thread binded the quilt with my Serger using a wave stitch. I love this stitch and finding I'm doing it more often instead of tradition binding.

And then....
...Mother and I wrapped up in the finished quilt.  My motto is a newly finished quilt should immediately be wrapped around someone!

Have you made a memory quilt or a t-shirt quilt? 
It was an honor to make this one.

Thanks for stopping by.  Hope you have a blessed day.

Happy Living! Happy Quilting!


Sunday, November 24, 2013

Black Tie Boogie - My Day!

My day is finally here. This has been such a great Blog Hop and I hope you've enjoyed seeing all the great projects...I know I have! It's hard for me to pick my favorites! Thanks Vickie and Mdm Samm for the time and effort that has gone into this successful Hop and giving me the opportunity to "strut" my stuff!

To begin....I have so many roosters and chickens it's absolutely ridiculous! I have them as figurines, vases, and plates and bowls. They are stuffed, made from sea shells, metal, ceramic, cloth, yarn, glass, wood, and paper. My collection goes from lamp shade toppers to tape dispensers! Some are funny, some are new and some are very old. I recently had to box up...(that is, use several boxes)... a number of them because I was over-run with chickens and roosters.


So....I've added more to my collection for this Hop....go figure! I thought I would make something useful and not just something to sit around waiting for me to dust it. So....I did some pot holders.

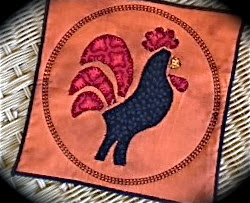
This first one was an applique design from EQ7.  It was really easy to do, very few pieces, and I machine appliqued it.


I used the circular attachment for my sewing machine and was able to stitch a perfect circle around the design. I picked one of the decorative stitches from my machine. We should all experiment and use those hundreds of  decorative stitches more. Play around and give it a try! 

For those who read my postings know how much I love to use my Serger. So for the edge I did a serged narrow rolled hem! 


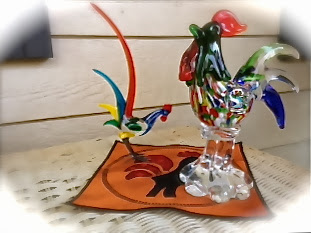
A few more of my roosters welcoming the new addition.


With Thanksgiving knocking at our doors here in the United States, of course I had to do Thanksgiving potholders too!

I like to do machine embroidery so here is a happy Tom Turkey waving at you and wishing you a Happy Thanksgiving!


And a closer view...over 45,000 stitches.


I again used a decorative stitch from my sewing machine to stitch around the design and a narrow rolled hem from my Serger.


 Oops....lets look at Tom Turkey again......


He hung around a little too long!


Thanks for visiting me today during the Hop and hope you continue to have fun visiting  the other participants scheduled for today:


The complete schedule can be found HERE

Have a great week.


Happy Living! Happy Quilting!


Sunday, October 27, 2013

My Day - Wicked Blog Hop and a Giveaway

Hope everyone is enjoying the hop and getting lots of marvelously wicked ideas. Thanks goes out to Wendy and Madame Samm for their excellent cheerleading skills and getting this hop together for us to showcase our talents!

Now...What to DO, What to Do!!

I wanted to try a technique that I've not done before and make use of my serger and embroidery machine...the ideas were swirling in my head!  

Okay...time to come out of the box and DO applique I said. "Applique? Really?" you say,  "You've never done applique before? And how long have you been quilting?" I know, I know...it's always intimidated me (sigh). I never wanted to take the time to transfer ALL those pieces, iron ALL those pieces, cut out ALL those pieces, then sew ALL those pieces. (sigh, sigh, sigh and sigh). So I picked a fairly easy design from the Happy Harvest book from The Wooden Bear and changed it up a bit to suit my needs. They did a pillow but I decided to do placemats instead.


They were very easy to assemble (only 28 pieces each...each placemat that is).


I did machine applique for the first time and rather enjoyed it...and was rather impressed with myself on how they turned out. Instead of batting I opted for a firm interfacing and ironed it to the backing fabric of the placemat then stitched in the ditch around both sides of the checked border. It seemed enough to hold everything down and not puff up. All they're going to be doing is sitting on the table anyway.


 I debated with myself on how to finish the edges of the placements...binding? That's how we always do it.  I needed to come out of my box more and remembered the Wave Stitch that my serger does. It was a perfect solution and was quick and easy. I chose a loose wave stitch to give it a more primitive look. 


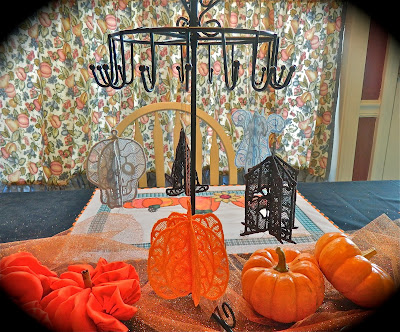
But...I wanted to do more to complete my tables appearance so I dug through my embroidery designs and found some Halloween 3D ornaments to use as a centerpiece.


They were fun and easy to do. Lace is achieved by using water-soluble stabilizer .


The stabilizer is hooped and the design is stitched right onto the stabilizer then cut close to stitching and soaked in water for a few minutes. Wha-la...the stabilizer is gone and you are left with just the embroidered thread design....hence...lace.


Each are stitched out in three-like designs and then slotted together.  I needle and threaded each design together on the top and let them dangle.


The pumpkin was my favorite! 


My next table decoration actually was inspired by my DH. He had seen a pumpkin made with mason jar lids that had been painted orange and arranged in a circular pattern. Well...I thought...I can do that with yo-yo's I'm sure....and I surely did it! I used cinnamon sticks for the stems. Thanks DH!


And of course, we need to have a pumpkin recipe. This is the easiest muffin recipe and...oh so moist. Only two or three ingredients (even better)!


1. Boxed Spice Cake mix, 1 box 
2. Canned pumpkin, 15 oz. (not pie filling)
3. Nuts, seeds, raisins, dates of your choosing if desired

Combine dry cake mix and pumpkin...stir, stir, stir. Batter will be thick. Set aside for about 10 minutes, if desired, to rest batter and let dry mix incorporate into pumpkin, then stir, stir, stir again until well incorporated..batter will still be thick. Stir in nuts, seeds, raisins and/or dates if desired. Spray a muffin pan with spray oil and plop thick batter into muffin tins filling each about two-thirds full. (Don't forget to taste the batter...it's awesome. I was looking for something to spread it on).
Bake in preheated 350 degree oven for 12 - 15 minutes until golden brown. Makes 16 - 18 muffins.

I've also used lemon cake mix and vanilla cake mix but I think the spice cake mix is the best due to the added spices. The moisture is perfect so don't add any liquid. My sister added applesauce one time and water another time and the muffin tops were tacky after cooled. 

Soooo good and Soooo simple!!

Remember to check out today's Wicked Bloggers and see what Wicked things they have done:

Georgia-Girl Quilter (you are here)


And now for the giveaway.....

I am offering to one lucky person this Good Morning Charm Pack from Moda


I bought one for me too and just look at these fabulous prints...and this is just a dabble of what's in the pack!


It will bring some nice cheeriness to the cold dreary winter months ahead or continued sunshine to the coming summer months in the southern hemisphere!

Easy Rules...
1. Leave a nice comment.
2. For a second chance follow me and tell me you are following me in a separate comment.
3. Winners will be picked on Nov 1st by random number generator.
4. I have to be able to reach you by email so please make sure that I can.
5. I will ship internationally...no problem.

Thanks for stopping by and I hope you have a wickedly good time during the rest of the hop!!

Saturday, October 19, 2013

Sewing It - Serger Style and Wicked Blog Hop

Sergers are more versatile than we know.  My serger is an important machine in my sewing studio and I use it for all my sewing projects...even quilting projects. 


Here I've done a serged wave stitch on a project for the Wicked Blog Hop.


See all the excitingly Wicked projects created by those Wicked bloggers October 22nd thru October 31st. Be sure to hop on over to our Wicked cheerleader Wendy at Why Knot Kwilt and peek at the schedule. You're sure to get lots of marvelously creative ideas and have a wonderfully Wicked time! I'm sure giveaways will be offered too...I know I'm offering one!


My day is October 28th so check back and see how Wicked I've been and enter my giveaway.


Monday, May 27, 2013

Another Finish

My Kaleidoscope quilt has been finished for several weeks now and resides on my bed. I love it and my DH loves it. My Longarm quilting still needs to be perfected, but the only way that's going to happen is by doing. (This is the 3rd quilt I've done on my Longarm). It's hard to see the quilting from the front of the quilt because the Kaleidoscope (K) blocks are so busy. When I arrived at the part of quilting the K blocks I was in quite a dilemma because I didn't want to take away from the K design. So, I just went with it and followed a design pattern from the K block itself, resulting in each block being quilted differently based on the K design of that block. So...I quilted and quilted and quilted for what seemed like forever thinking I would never get to the end of this king sized quilt. 

Well....I didn't know what was happening on the reverse of the quilt...when I unrolled it from the frame this is what I discovered....


My quilt is now reversible. I wasn't even thinking about the back of the quilt! I was totally blown away. Now,  for you expert quilters, this may be nothing to you, but after seeing the reverse of my quilt I was totally impressed with myself!


Every single block is different...just like on the front!

Here is a partial view of the front...on my bed. I used my serger to create a wave stitch for the binding. I totally dislike doing traditional binding and call my methods "Binding without Boundaries" or maybe "No Boundaries for Bindings".


I don't want this post to get too long so I'll do another post later about my experimentation with bindings...especially my serger method. I would love to put together some serger tutorials...there is so much that can be done with the serger in general and combined with quilting. I've even done a mitered border using my serger! Maybe tutorials are in my future (More to come on that too).

Thanks for visiting! Have a blessed day!

Happy Living! Happy Quilting!

Saturday, February 16, 2013

It's A Saturday Sharing Day at Pigtales and Quilts. Go take a look at what everyone else is sharing on this Saturday and share something yourself. It's easy to link up! This is what I would like to share...

Happy Saturday! And Happy Saturday Sharing Day.
 
I sewed the last quilting stitch on my black and white diamond quilt which I'm naming "DeAnna's Diamonds" This was the first quilt that I quilted on my longarm...I finally showed that machine who was boss, after saying to myself..."self, it's only thread and not a permanent marker...thread can be removed". I realized I was right...and I removed all stitches that I was unhappy with. (It also helped that the thread was black and I was stitching on mostly black and the backing was a busy white flower on black...you really couldn't see the stitching at all)


See..you really can't see the stitching on the back..maybe if you zoom really close...but you don't have to do that...just take my word for it that there's stitching there!


This is the border. I quilted the arches between each diamond on the border. Sorry for the poor picture quality...but you get the idea. My sister at Sew Much and More gave me these rulers for Christmas.
 
 
I generally serge the edges of my quilt before I put on the binding. It holds the layers together PLUS cuts off the excess batting and backing all at the same time!


Serging makes a nice support for the binding. This is a wide three thread overlock so it doesn't add too much bulk.
 
This is my serger. I love, love, lover her! She is so versatile! I've pieced several quilts with her and my seam allowance is always perfect...she sews a perfect 1/4 inch overlock stitch! And my edges are neatly finished.
 
 
But threading and tension adjustment is such a horrific chore you say? Not this "Baby"...I just put the thread about a half inch inside the threading ports and press the "Push to Thread" button.... and with a whiff of air it threads...


...even threads the looper needle eyes!... Amazing...it's certainly an Evolution in serging. Like I said...I love, love, love her!
 
 
Let's see what else I can share today....oh yeah...
I'M A WINNER!!!
 
I blogged hopped in the Dare to Dresden Blog Hop and I won this beautiful fat quarter from Debbie over at a Traveling Quilter. Thanks Debbie for offering the giveaway...especially since I won!


I am also taking an online quilting class at Quilt University. I'm taking Designer Pinwheels taught by Dena Crain  She is a really awesome designer and I look forward to learning a lot in the 4 week course.
 
 
Now..on to finishing my quilt...binding and a label and I'm done with "DeAnna's Diamonds" and a February UFO project.
 
Oh... and a quick and easy beverage recipe for a cold winter night:
 
Irish Coffee


Ingredients:

  • 2 teaspoons sugar, or to taste
  • 2/3 cup hot brewed coffee (decaf can be used)
  • 2 tablespoons Irish whiskey (or Irish cream Liqueur)
  • whipped cream

Preparation:

Combine first 3 ingredients; top with a generous dollop of whipped cream. Sprinkle with nutmeg if desired. Makes 1 serving.
 
Thanks for stopping by and visiting. I love reading your comments!
 
Happy Living! Happy Quilting!


Wednesday, September 14, 2011

Quilt retreat coming up

I signed up for Saturday's quilt retreat at my LQS. I went in July and we had such a blast. Sewed, laughed, ate, laughed, sewed, ate, laugh, ate, sewed...from 9am to 9pm. Check it out on my LQS blog. There are also pictures of my Honeyberries quilt that I serged using deco thread and a picture of my gold and silver serged table topper. I even made the tassels on my serger! The site has some great pics. I'm looking forward to this Saturday. I'm back in school trying to earn my Master's of Science in Nursing...and working full time. Just finished up with a course and I have a week and a half off before starting again....I NEED TO TO SEW!

My new sewing technique and personal goal is to become a serger diva. My last few projects, I've done on the serger...I even did mitered corners on a border...I held my breath and let the machine do the sewing an cutting...it's the best mitered border corner I've ever done! (Done on the gold and silver table topper). I embroidered a pretty gold ornament on the center block.

Everyone...please a have great evening and rest of the week. Thanks for visiting.

Happy Quilting, Happy Living!.....DeAnna