Showing posts with label giveaway. Show all posts

Wednesday, February 26, 2014

Received a Very Nice Prize

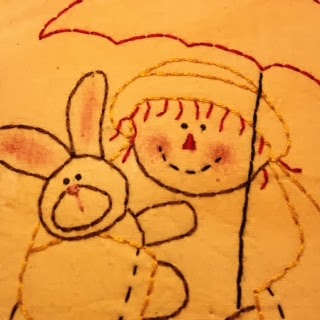
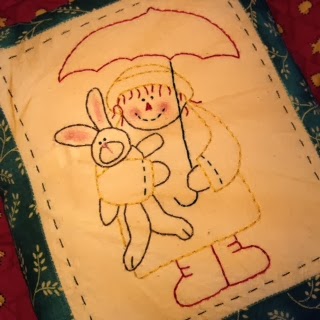
Isn't this a lovely little pillow? I won the giveaway hosted by Attic Raggedys during the Grow Your Blog Hop.


Look at those faces! So cute! She did an awesome job on the stitching. Receiving a hand stitched gift is such a treasure!! I appreciate all the work that went into it and absolutely love it!


Visit Attic Raggedys...her blog site is awesome, fun and happy! She has an Ebay store and an website, atticraggedys.com, offering a ton of lovely items from patterns to fabric.


Thanks Judy. Your do beautiful work.

Hope everyone has a great day. Thanks for visiting!

Happy Living! Happy Quilting!


Thursday, February 6, 2014

It's My Birthday Today - And I'm Having a Giveaway

Happy Birthday to ME!

I'm not telling my age but I'm in the 45 - 60 age category.

I've been very blessed by God in Heaven throughout my life of 45 to 60 years.  I've met some wonderful folks that have inspired me in everything that I love to do.

 I've been blessed:
  • with a husband that always puts me first and indulges me (and doesn't question my fabric stash or the time I spend in my sewing studio). 
  • with a daughter who has never caused us any problems and is becoming her own person in her own way.
  • to have been born into a loving family that supports each member.
  • to be healthy and
  • to be wise (sometimes)
Thanks to all who have inspired me throughout my life.

 To Celebrate my birthday I'm having a giveaway.


I will give to one lucky winner a personalized Embroidered Sewing Studio artwork similar to  the examples pictured above. Frame not included. The design will be embroidered on Osnaburg Muslin and will fit into a 10 x 13 inch frame...remember frame not included.  The winner will have their choice of thread color for the wording. This will look great in your sewing studio!

  1. Leave me a comment and tell me your choice of  thread color. (don't worry, the winner will be contacted and thread color will be discussed further.)
  2. If you are a no-reply commenter then I will need to be able to contact you through email, so make sure that I can.
  3. Giveaway is open to anyone who leaves a comment.
  4.  I will ship anywhere.
  5. Follow me for a second chance and let me know in a second comment.
  6. Giveaway is open until Thursday, February 13th. Winner will be drawn on Friday, February 14th.  
Good Luck and I hope you enjoy my birthday as much as I plan to!

Friday, January 24, 2014

Grow Your Blog - A Blog Hop and A Giveaway

Hi there and welcome to my blog, Georgia-Girl Quilter. My name is DeAnna and I'm so very happy that you stopped by for a visit. A huge "Thank You" goes out to Vicki at 2 Bags Full for all her hard work in pulling this Hop together. The number of participants is astounding and surely everyone will have fun visiting and following as many blogs as they can...I know I will!

When visiting my blog you will see posts about my journeys in quilting, machine embroidery, Serging, and becoming a Longarm Quilting Diva. Its amazing how these different machine functions can add to the finished project and I love sharing with you what I've learned, here on this blog. I also love to cook so I've created a "Recipe" tab to share my favorite recipes with you.

Here are three of my Kaleidoscope blocks from my Kaleidoscope Quilt. This was a fun quilt to make.


I come from a sewing family and it's such a joy to have family members who all enjoy the same craft. We rely on each other's opinions and you will often time see links to my sister at Sew Much and More. (Who, by the way, is also participating in this Hop!)  I'm inspired by the many blogs I follow and visit and you will also see links to these various blogs hoping they will inspire you too!

I enjoy participating in Blog Hops and they really help me to expand my comfort zone while expanding my creative abilities. 


I love using my Serger to create edges such as these on my projects.
There is so much a Serger can do and I'm only touching the surface. I hope to start a Serger Series soon so that I may share all I'm learning with you.  
So...check back soon!


When quilting, I have a chance to stitch out something nice on my embroidery machine. I set it up and let it do its thing while I go about my quilty business.


And I always like a quilt loaded on my longarm...ready to be quilted. 


This is one of my favorites. The string piecing technique made a striking two color quilt.


I'm looking forward to following and visiting you and getting to know you too. You can read more about me in the "About Me" section on the sidebar. I always enjoy reading your comments and learn so much from my readers through their comments.

To see a list of participants visit Vicki at 2 Bags Full and start visiting and following all the different blogs. There are many who are having giveaways too!

Anyone up for a giveaway?
What about two giveaways?
I have for you:


Giveaway #1
Four fat-eights


Giveaway #2
A personalized pen embroidered with your name


1.  Just leave a comment and also tell me which item you prefer. Make sure I can get in touch with you, especially if you are a no-reply blogger.

2.  If the two winners requested the same item then the first drawn will receive the fabric and the second will receive the personalized pen.

3.  Winners will be drawn on February 15, 2014.

4.  This giveaway is open to anyone and I will ship anywhere.

Thanks for visiting and enjoy the rest of the blogs participating in this Hop.
Happy Living! Happy Quilting!


Sunday, October 27, 2013

My Day - Wicked Blog Hop and a Giveaway

Hope everyone is enjoying the hop and getting lots of marvelously wicked ideas. Thanks goes out to Wendy and Madame Samm for their excellent cheerleading skills and getting this hop together for us to showcase our talents!

Now...What to DO, What to Do!!

I wanted to try a technique that I've not done before and make use of my serger and embroidery machine...the ideas were swirling in my head!  

Okay...time to come out of the box and DO applique I said. "Applique? Really?" you say,  "You've never done applique before? And how long have you been quilting?" I know, I know...it's always intimidated me (sigh). I never wanted to take the time to transfer ALL those pieces, iron ALL those pieces, cut out ALL those pieces, then sew ALL those pieces. (sigh, sigh, sigh and sigh). So I picked a fairly easy design from the Happy Harvest book from The Wooden Bear and changed it up a bit to suit my needs. They did a pillow but I decided to do placemats instead.


They were very easy to assemble (only 28 pieces each...each placemat that is).


I did machine applique for the first time and rather enjoyed it...and was rather impressed with myself on how they turned out. Instead of batting I opted for a firm interfacing and ironed it to the backing fabric of the placemat then stitched in the ditch around both sides of the checked border. It seemed enough to hold everything down and not puff up. All they're going to be doing is sitting on the table anyway.


 I debated with myself on how to finish the edges of the placements...binding? That's how we always do it.  I needed to come out of my box more and remembered the Wave Stitch that my serger does. It was a perfect solution and was quick and easy. I chose a loose wave stitch to give it a more primitive look. 


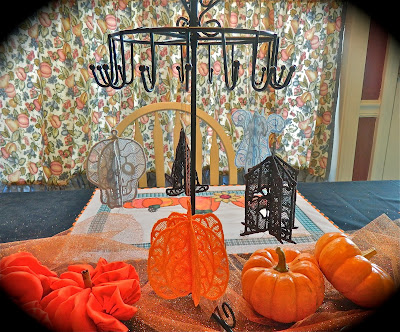
But...I wanted to do more to complete my tables appearance so I dug through my embroidery designs and found some Halloween 3D ornaments to use as a centerpiece.


They were fun and easy to do. Lace is achieved by using water-soluble stabilizer .


The stabilizer is hooped and the design is stitched right onto the stabilizer then cut close to stitching and soaked in water for a few minutes. Wha-la...the stabilizer is gone and you are left with just the embroidered thread design....hence...lace.


Each are stitched out in three-like designs and then slotted together.  I needle and threaded each design together on the top and let them dangle.


The pumpkin was my favorite! 


My next table decoration actually was inspired by my DH. He had seen a pumpkin made with mason jar lids that had been painted orange and arranged in a circular pattern. Well...I thought...I can do that with yo-yo's I'm sure....and I surely did it! I used cinnamon sticks for the stems. Thanks DH!


And of course, we need to have a pumpkin recipe. This is the easiest muffin recipe and...oh so moist. Only two or three ingredients (even better)!


1. Boxed Spice Cake mix, 1 box 
2. Canned pumpkin, 15 oz. (not pie filling)
3. Nuts, seeds, raisins, dates of your choosing if desired

Combine dry cake mix and pumpkin...stir, stir, stir. Batter will be thick. Set aside for about 10 minutes, if desired, to rest batter and let dry mix incorporate into pumpkin, then stir, stir, stir again until well incorporated..batter will still be thick. Stir in nuts, seeds, raisins and/or dates if desired. Spray a muffin pan with spray oil and plop thick batter into muffin tins filling each about two-thirds full. (Don't forget to taste the batter...it's awesome. I was looking for something to spread it on).
Bake in preheated 350 degree oven for 12 - 15 minutes until golden brown. Makes 16 - 18 muffins.

I've also used lemon cake mix and vanilla cake mix but I think the spice cake mix is the best due to the added spices. The moisture is perfect so don't add any liquid. My sister added applesauce one time and water another time and the muffin tops were tacky after cooled. 

Soooo good and Soooo simple!!

Remember to check out today's Wicked Bloggers and see what Wicked things they have done:

Georgia-Girl Quilter (you are here)


And now for the giveaway.....

I am offering to one lucky person this Good Morning Charm Pack from Moda


I bought one for me too and just look at these fabulous prints...and this is just a dabble of what's in the pack!


It will bring some nice cheeriness to the cold dreary winter months ahead or continued sunshine to the coming summer months in the southern hemisphere!

Easy Rules...
1. Leave a nice comment.
2. For a second chance follow me and tell me you are following me in a separate comment.
3. Winners will be picked on Nov 1st by random number generator.
4. I have to be able to reach you by email so please make sure that I can.
5. I will ship internationally...no problem.

Thanks for stopping by and I hope you have a wickedly good time during the rest of the hop!!
Sunday, April 7, 2013

April Showers Mug Rug Blog Hop and a Giveaway

Hello there! Welcome to the April Showers Mug Rug Blog Hop...Day 1

Wow...you've made it to the last blog of the day. Congratulations! I'm sure you've seen some really awesome mug rugs today.

I want to send a big THANK YOU to Erin at Sew At Home Mummy and Madame Samm for all the hard work they did in getting this Blog Hop organized. Great job you two!

I thought it would be simple to create a mug rug. Making it was easy. Designing it proved to be a challenge. So many ideas floating around in my head it was hard to decide what I really wanted to do. I came up with two mug rugs. I wanted to do more but life just kept getting in the way...you know how that goes I'm sure!

I love to machine embroidery and I love combining quilting and embroidery. I searched through some of my embroidery designs and found an Anita Goodesign pattern from their Quilter's Dream collection. The design stitches out in four sections and then the four sections are sewn together. 


I sewed the pieces together then stitched down the center to tack the backing and batting to the front of the mug rug.


 I used my featherweight to sew the sections together. I just love that little machine. It's such a joy to sew on!


My first mug rug completed...


...and put to use! Yay!


For my second mug rug I decided to do an applique pattern that I did on my embroidery machine. This design came from Emblibrary.com. They have thousands of instant downloadable designs (which has been proven dangerous).


It was fairly easily to do. I had to just make sure the fabric pieces were in the correct place and position.


The stitched out design fresh off the embroidery machine.


After I applied my batting and backing I decided to do echo quilting around the design to finish the mug rug off.


Second mug rug now completed. A double Yay! Yay!


I hope you enjoyed my mug rugs. I had a lot of fun making them. 

I'm also offering a GIVEAWAY...Yay! Not just one but two! Yay! Yay! Don't you love giveaways. I would like to give these two sets of fat quarters as a prize to two lucky followers as THANKS for following me!


I bought these fat quarters from Mama's Quilt Shop during the Christmas Holiday. A lovely quilt shop in Independence, La. The top three fat quarters will go to the first follower that is picked and the second three will go to the second follower that is picked. 


The rules are simple...

1. Follow me and leave a nice comment letting me know...that's it!
2. Winners will be picked on April 19th.
3. I have to be able to reach you by email so please make sure that I can.
4. I will ship to international followers...no problem.

Here is today's list of participating blogs...

Erin @ Sew at Home Mummy
 Patty @ A Stitch in Time
Jenny @ Squawk That
Stacey @ The Tilted Quilt
Daryl @ Patchouli Moon Studio
Lisa @ The Boon Docks
Julie @ Jolie Maxtin: the project girl
Beluah @ Sowing Stitches
Karen @ Bungalow Bay Quilts
   and then me....
DeAnna @ Georgia Girl Quilter
Thanks so much for visiting and enjoy the rest of the Hop...I know I will!!