Wednesday, January 29, 2014

Snowpocalypse 2014 - Atlanta is Frozen!

What a mess this weather system has caused here in the South...and also maybe poor planning by government and private companies! I feel for the kids that had to stay at the schools overnight and the parents trying to get home but were stuck in the massive gridlock created by EVERYONE trying to get home. It's like snowpocalypse around here! We are just not prepared for this kind of weather. It may make for a pretty scene, but I'd rather have the green grass and warmer temps we are so accustomed to.


This was from a traffic cam on I-20 this morning, west of the city. These people are stuck in the ice...no one is moving. I heard that Kroger Grocery store kept there doors open through the night and allowed folks to take refuge in the stores.  A FaceBook group was trying to get to people stranded in cars, bringing them food, water and gas. Hotel rooms filled up throughout the city so most of the stranded people had no where to stay anyway. Churches also opened their doors to help accommodate the stranded. At least there is still compassion out there for those in need. Oh and a baby was born in a car while the parents struggled to get to the hospital. The National Guard is now teaming with law enforcement and helping all the stranded folks...THANK YOU TO ALL THAT SERVE!


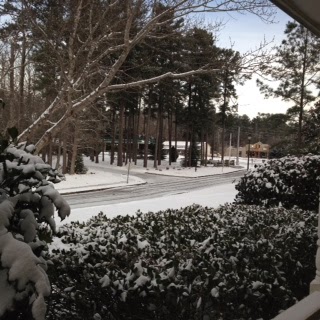
Why do we have all this sophisticated weather forecasting if government and private companies don't heed the warning! Gosh I received the winter weather alert Sunday night on my cell phone! And quickly made sure I had all I needed for sewing my projects! Anyway...snowpocolypse 2014 continues with freezing temps until tomorrow.  Luckily I'm retired from nursing for the time being and my DH's company was smart and decided to close until tomorrow.... and I'm home...sewing!

This is what I'm currently working on:


I made these during our Annual Family Sewing Retreat in October. They came together quickly and were rather fun to make. One bag takes 2 fat quarters.
 
I'm wanting to use small panels for the front of the bag but I'll need to move the zipper up an inch or so...or maybe relocate the zipper opening to the bag top.
 
I love these panels. They make me laugh every time I look at them. I know some nurses that actually look like these and I'm sure you know some too!


They are the Nifty Nurses Collection by Loralie Harris for Loralie Designs. I'm using one panel per bag so I definitely have my choice of which Nifty Nurse to use!

Thanks for stopping by and your comments are always welcome. Stay warm!

Happy Living! Happy Quilting!


Friday, January 24, 2014

Grow Your Blog - A Blog Hop and A Giveaway

Hi there and welcome to my blog, Georgia-Girl Quilter. My name is DeAnna and I'm so very happy that you stopped by for a visit. A huge "Thank You" goes out to Vicki at 2 Bags Full for all her hard work in pulling this Hop together. The number of participants is astounding and surely everyone will have fun visiting and following as many blogs as they can...I know I will!

When visiting my blog you will see posts about my journeys in quilting, machine embroidery, Serging, and becoming a Longarm Quilting Diva. Its amazing how these different machine functions can add to the finished project and I love sharing with you what I've learned, here on this blog. I also love to cook so I've created a "Recipe" tab to share my favorite recipes with you.

Here are three of my Kaleidoscope blocks from my Kaleidoscope Quilt. This was a fun quilt to make.


I come from a sewing family and it's such a joy to have family members who all enjoy the same craft. We rely on each other's opinions and you will often time see links to my sister at Sew Much and More. (Who, by the way, is also participating in this Hop!)  I'm inspired by the many blogs I follow and visit and you will also see links to these various blogs hoping they will inspire you too!

I enjoy participating in Blog Hops and they really help me to expand my comfort zone while expanding my creative abilities. 


I love using my Serger to create edges such as these on my projects.
There is so much a Serger can do and I'm only touching the surface. I hope to start a Serger Series soon so that I may share all I'm learning with you.  
So...check back soon!


When quilting, I have a chance to stitch out something nice on my embroidery machine. I set it up and let it do its thing while I go about my quilty business.


And I always like a quilt loaded on my longarm...ready to be quilted. 


This is one of my favorites. The string piecing technique made a striking two color quilt.


I'm looking forward to following and visiting you and getting to know you too. You can read more about me in the "About Me" section on the sidebar. I always enjoy reading your comments and learn so much from my readers through their comments.

To see a list of participants visit Vicki at 2 Bags Full and start visiting and following all the different blogs. There are many who are having giveaways too!

Anyone up for a giveaway?
What about two giveaways?
I have for you:


Giveaway #1
Four fat-eights


Giveaway #2
A personalized pen embroidered with your name


1.  Just leave a comment and also tell me which item you prefer. Make sure I can get in touch with you, especially if you are a no-reply blogger.

2.  If the two winners requested the same item then the first drawn will receive the fabric and the second will receive the personalized pen.

3.  Winners will be drawn on February 15, 2014.

4.  This giveaway is open to anyone and I will ship anywhere.

Thanks for visiting and enjoy the rest of the blogs participating in this Hop.
Happy Living! Happy Quilting!


Saturday, January 18, 2014

The Road to Being a Longarm Quilting Diva...

...is a very bumpy road indeed with seam ripper and tweezers in hand!!!

I wanted to quilt this top I made several years ago. It's one of the five I need to do that's on my "To Do" list for 2014.  I've never used the laser light on my Longarm to trace pantographs so I thought this would be a great opportunity to try it.


From EQ7 I found 2 stencils that looked rather easy and then combined them....Leaves and dragonflies. I then traced the design on some long tracing paper. I practiced for about an hour going over and over the design with my machine not threaded to get the feel of the design. I know this sounds very lame to all those great Long Armers out there for this so simple design...but I have to start somewhere right?!..and some day I want to be a great Long Armer too!

I'm always afraid to start quilting a top and have to constantly remind myself that it's only thread and it CAN be removed...hence the ripper and the tweezers!


I thought this dragon fly came out rather nice...it was near the center of the quilt after I quilted several rows...practice, practice, practice. The quilting stitched out very dainty looking.


And I'm not afraid to show the "not so good" ones either. I'll get better with practice, practice, practice.
 
 
The leaves came out well and by the end of the quilting adventure I no longer needed the pantograph design.
 
 
I then let my Serger do its thing...cutting off excess fabric and finishing the edges. The quilt is now ready for binding. Hmm...should I do a serged thread binding or traditional binding. You all know how much I like using my Serger!
 
I'll post an updated pic as soon as I get it binded.
 
Thanks for stopping my. Have a great day!
 
Happy Living! Happy Quilting!


Thursday, January 16, 2014

T-shirt Quilt - My first

My DD who is now 23 years old had finally released some of her high school and sports t-shirts to me so that I could make a quilt or should I say quilts.  I think she was running out of storage room. This is the first t-shirt quilt I've made (ever) and I probably have enough t-shirts now to make 5 or 6 more bigger quilts for her. After taking this pic and viewing it we've decided to change the top right corner square and use a different t-shirt for that particular square. The square that's there just sort of sticks out to much.  (She didn't know I already sewed the thing together. At least it wasn't the middle square she didn't like.) I plan to do an all-over stipple design in order to make quick work of it.


I need to add borders yet...good thing I've not done that yet since I need to make changes! I'm thinking of doing borders in red since her HS colors were, as you can guess, red and black.
 
After looking more at this pic, I really don't like that top right square either! I'm sure I can find something from the 3 garbage bags that are stuffed with t-shirts!
 
Thanks for visiting!
 
Happy Living! Happy Quilting!

Saturday, January 4, 2014

1st Annual Family Sewing Retreat

I seem to be reverting back to my recent past...and posting really late about happenings in 2013. After this post I promise to move forward into 2014.

I happily regress back to late October, 2013 where we, meaning my 3 sisters and Mother, gathered for our 1st Annual Family Sewing Retreat. This was no small accomplishment since I'm in Georgia, our Mother and one sister is in Louisiana, a sister in Arkansas and one in central Texas. It took quite a bit of planning, emailing, and texting to get our dates set...but we did it and set the date for our Sewing Retreat the last two weeks in October.

Our Mother is conveniently located in Louisiana which was an easy drive from Georgia and a nice stopping point on my way to Texas. After a day's rest in Louisiana my mother, her sewing supplies, me and my sewing supplies drove the 12 hours to my sister's home in central Texas. The first week was spent in Texas and the second week we all drove, in a three car convoy, to Arkansas.  My Arkansas sister who has a blog wrote a fantastic account of our sewing adventure. You can read about our fun-filled family retreat and see pictures of Part 1 - Texas and Part 2 - Arkansas on her blog, Sew Much and More. Meet the family and see how we almost bought a live goat, visited quilt shops and what all we bought and made during our two weeks together.

Here are some of the items I made:

Two pillow cases and a "tater baker" sack.
(The goat in the background was pregnant and delivered, I think twins, two weeks after we left)


A Christmas table topper which I've yet to quilt. It's a Schnibbles pattern by Miss Rosie's Quilt Company called Sunday Best. It was made using 64 Charms and 3/4 yard background fabric. I love the pieced border.


And two little purses. I won these purse kits years ago from A Thread of Red, the blog for my LQS. It's from Lazy Girl Designs and called Runaround Bag.


My sister's horses and donkey enjoyed our photo ops and were always alert to what we might be carrying in our hands and hoping it was a snack for them.
 
We all had a great time laughing, sewing and just being together.
 
 
Now I move forward to December 2013. Here are the Christmas gifts I made for family members. Couldn't post at the time of completion for fear of ruining the surprise.


I machine embroidered dishtowels and potholders for my SILs and MIL. These are 3 of the 6 designs I stitched out.  They're from the Anita Goodesign collection "Baltimore Quilt" and stitched out really well as those designs generally do.


Here are some of the potholders...well these are actually mine. My mistakes in the learning process of adding a backing without removing the project from the hoop in order to keep the design centered. I figured it out and got some potholders for myself too.


The stippling stitched by the embroidery machine shows on the front and back. The center design only shows on the front.
 
 
And I made these pillows for my grand nieces. I included a zipper in the bottom pocket/pillow seam for easy removal of the pillow form so the covering can be washed. 


The sleeping Cat is from Designs by JuJu.
 
 
And lastly for my Mother, sisters and SIL I made these pillows. My father passed away in 2012 and these pillows were made from some of his cotton shirts. I hugged each pillow as I finished them. The pinwheel design went to each sister and my Mother received the other design.
 
 
....and the pillow back made from 108" quilt backing fabric.
 
 
The below frames I stitched out for 2 of my sisters who are converting rooms in their homes into their sewing studios. Yay for them!  You know how we quilters want our own space.


The Sunbonnet Sue design was downloaded from Embroidery Library.


Okay...now I'm done with 2013 and can happily move forward into 2014.  I wonder what it holds?
 
Thanks for visiting me and I love to read all your comments. Have a great weekend!
 
Happy Living! Happy Quilting!


Thursday, January 2, 2014

Goodbye 2013...

.....Hello 2014

I wanted to start the new year with a tidy space, so I spent December 30th and 31st organizing, straightening and rearranging my space which I actually accomplished in those two days!  I truly believe that a tidy space makes for a tidy (and more productive and creative) mind.

 
This old billiards table serves as my cutting station. It's the perfect size and height and I refuse to get rid of it as my DH often times suggest. I store pencils, fabric markers, scissors and rotary cutter in the ball pockets. I just added the white drawers for rules and embroidery stabilizers. Before, the rulers were just stacked on top of each other in a complete mess. This month I plan to make a table skirt for the table to hide the scrap bins I have under the table ledge. Not sure about the fabric yet, but it will be happy.

 
You couldn't even get to this area without having to move ironing board and other stuff. I'm wanting to put shelves up on the wall.  Can't have an empty unused space just hanging around.
 
 
And I put a quilt on the longarm to begin the New Year!
 
How is your space looking?
 
Stay tuned for more posts on Christmas gifts I made. Couldn't post anything for fear of ruining the surprise for the recipients.
 
Happy Quilting! Happy Living!