Saturday, February 16, 2013

It's A Saturday Sharing Day at Pigtales and Quilts. Go take a look at what everyone else is sharing on this Saturday and share something yourself. It's easy to link up! This is what I would like to share...

Happy Saturday! And Happy Saturday Sharing Day.
 
I sewed the last quilting stitch on my black and white diamond quilt which I'm naming "DeAnna's Diamonds" This was the first quilt that I quilted on my longarm...I finally showed that machine who was boss, after saying to myself..."self, it's only thread and not a permanent marker...thread can be removed". I realized I was right...and I removed all stitches that I was unhappy with. (It also helped that the thread was black and I was stitching on mostly black and the backing was a busy white flower on black...you really couldn't see the stitching at all)


See..you really can't see the stitching on the back..maybe if you zoom really close...but you don't have to do that...just take my word for it that there's stitching there!


This is the border. I quilted the arches between each diamond on the border. Sorry for the poor picture quality...but you get the idea. My sister at Sew Much and More gave me these rulers for Christmas.
 
 
I generally serge the edges of my quilt before I put on the binding. It holds the layers together PLUS cuts off the excess batting and backing all at the same time!


Serging makes a nice support for the binding. This is a wide three thread overlock so it doesn't add too much bulk.
 
This is my serger. I love, love, lover her! She is so versatile! I've pieced several quilts with her and my seam allowance is always perfect...she sews a perfect 1/4 inch overlock stitch! And my edges are neatly finished.
 
 
But threading and tension adjustment is such a horrific chore you say? Not this "Baby"...I just put the thread about a half inch inside the threading ports and press the "Push to Thread" button.... and with a whiff of air it threads...


...even threads the looper needle eyes!... Amazing...it's certainly an Evolution in serging. Like I said...I love, love, love her!
 
 
Let's see what else I can share today....oh yeah...
I'M A WINNER!!!
 
I blogged hopped in the Dare to Dresden Blog Hop and I won this beautiful fat quarter from Debbie over at a Traveling Quilter. Thanks Debbie for offering the giveaway...especially since I won!


I am also taking an online quilting class at Quilt University. I'm taking Designer Pinwheels taught by Dena Crain  She is a really awesome designer and I look forward to learning a lot in the 4 week course.
 
 
Now..on to finishing my quilt...binding and a label and I'm done with "DeAnna's Diamonds" and a February UFO project.
 
Oh... and a quick and easy beverage recipe for a cold winter night:
 
Irish Coffee


Ingredients:

  • 2 teaspoons sugar, or to taste
  • 2/3 cup hot brewed coffee (decaf can be used)
  • 2 tablespoons Irish whiskey (or Irish cream Liqueur)
  • whipped cream

Preparation:

Combine first 3 ingredients; top with a generous dollop of whipped cream. Sprinkle with nutmeg if desired. Makes 1 serving.
 
Thanks for stopping by and visiting. I love reading your comments!
 
Happy Living! Happy Quilting!


Thursday, February 7, 2013

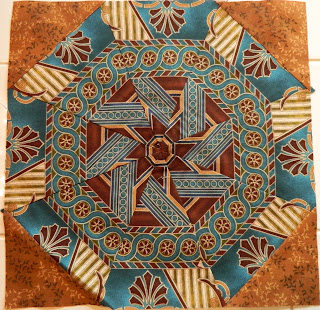
Fabric for Kaleidoscope blocks

Just a quick post.

I found a picture of the fabric I used for my Kaleidoscope blocks. The picture was taken in 2009 so I guess that's when I started the blocks. I wish I knew the name and manufacture of the fabric so that I could look for more. I didn't find any scraps in my stash or scrap pile...not even a tiny piece!


 It's amazing all the different designs I got out of this piece of fabric!

Have a great day!

Thanks for visiting.

Happy Living! Happy Quilting!

Tuesday, February 5, 2013

February UFO projects...and Etouffee recipe


Wow..February is here already and my Birthday is tomorrow! (I feel so wise these days...umm!!!) And Spring is just around the corner...in the northern hemisphere that is!!! (See told you I was wise now)

My UFO project(s) for February are as follows:

1.  Quilt my January FO for Shop Hop display in March. I bought a brand new Baby Lock Crown Jewel Long Arm in September and I've been practicing...some...it's so intimidating!! I mostly just look at it and talk to it, but now it's time to show it who's boss!! My sister over at Sew Much & More gave me some wonderful rulers/templates for Christmas and I've been practicing with those...they are great!

AND...

2.  I was rummaging through a bin looking for more black and white scraps for my January project and I found some Kaleidoscope blocks that I started about 2, maybe 3 or 4 or 5 years ago...you know what I mean. And...Oh My Goodness...how could I have forgotten about these blocks and how amazing they look!!! I may need to make one or two more depending on the layout...NOT...I have 59...yes...59 of these blocks...WHY?!! Don't know what I was intending to make in that other quilting life...two quilts maybe?!  They are 10 inch blocks...that is a lot of square inch-age! Just this morning when I was making my bed I was thinking about a new quilt for the bed...I think I've found it. I should have enough to even make pillows. So really all I have to do for this February UFO challenge is to add sashing and just sew the blocks together...easy peasy...right? Right! (Well, then sandwich it and quilt it, but I don't count that in current month's finish).

Here is a small sampling of the 59 blocks. Don't look too closely though as this was my first attempt at Kaleidoscopes...or what some call the horrid name of Stack and Whack (I dislike that name tremendously). All Kaleidoscopes are beautiful and unique no matter the fabric and should have a more elegant name...Stack and Whack...come on...really? Okay...here they are....


Aren't they so unique. If I remember correctly, all the blocks came from 8 single repeat design yardage, laid (stacked) on top of each other with design matched up then cut (whacked) using a certain degree ruler. I will need to re-fresh my memory on how these blocks are made! I love all 59 of them and think they will make a beautiful quilt. I find it amazing that all 59 came from the same single fabric design. Need to start thinking of sashing color though..green, brown, steal blue...umm.

When rummaging through that bin I also found  5 of these...I guess they are potholders. They are not that pretty but I really could use them...


And now for the recipe of the day:

Another Southern Louisiana dish. The name sounds like it would be a lot of work, but it's a simple dish.

Crawfish (Shrimp) Etouffee

é·touf·fée

noun, plural Ã©·touf·fées
New Orleans Cookery. a stew of crayfish, vegetables, and seasonings, served over white rice.
Origin: 
 < Louisiana French; French (à l')étouffée  cooked in a closed vessel with little liquid, braised; literally, to smother, suffocate.


Ingredients:

1/4 pound of butter
2 large onions, chopped
2 stalks celery, chopped
2 cloves garlic, minced
1 medium bell pepper, chopped
Salt, red and black pepper to taste
Tabasco sauce to taste
1 - 2 pounds crawfish tails or deveined shrimp
4 tablespoons flour
2 cups water
4 chicken bouillon cubes
Green onion tops to taste (optional)
Parsley to taste (optional)
Cooked rice

Melt butter in heavy skillet; saute onions, celery, garlic and bell pepper in butter over low heat until tender. Season to taste. Add crawfish or shrimp. Saute 1 minute; add flour. Continue cooking about 3 more minutes. Add water, bouillon cubes, green onions and parsley; Simmer for 10 -15 minutes. Serve over cooked rice. Serves 4 - 6.

Thanks for stopping by and visiting. I love to read your comments so please leave one! 

Hope you enjoy the Etouffee and have a grand day!

Happy Living! Happy Quilting!


Friday, February 1, 2013

January UFO - Finished (piecing)...and King Cake Recipe

It's A Saturday Sharing Day at Pigtales and Quilts. Go take a look at what everyone else is sharing on this Saturday and share something yourself. It's easy to link up! This is what I would like to share...

...I am so happy to report that I finished piecing my January UFO (quilting to happen this month). I think this quilt came out fantastic and is more stunning than what I expected. I love the blacks and whites! Quilt book and pattern information can be found here on a previous post. String quilts can use up so much thread. I bet I changed my bobbin at least 12 times! No matter I still love it. 

I was in a dilemma about the borders. I didn't want anything too fancy that might take away from the quilt, but didn't want just black borders either. I had thought about extending the side half diamonds into the border but that was going to take making 44 MORE squares and I was already wanting this quilt to end. Julie over at Julie's Quilts and Costumes  commented about the same idea of extending the diamonds and it made me thank about it again. Thank your Julie, your comment moved me in the right direction.


So I cut out 44 more stabilizer squares, 44 more black center pieces (which I had to re-design since I only wanted half a diamond and border section). I rummaged through my stash and found more black and white fabric and hoped the 7 inches of sparkly white fabric I had remaining for the outside of diamond was going to be enough. So I made these which is one fourth of a diamond and what I hoped would be a black border. Well, I made one at first....


Then two...and laid them out....then remembered I had to do mirror images when I sewed them together. (Glad I thought of that before I started sewing..whew). Happy with these two and what I hoped to accomplish in my mind, I sewed on...and on...and on. When I had all 44 completed I had a 1 inch strip left of my sparkly white fabric and was digging through the garbage can for black and white scraps I had discarded. But I had enough to finish!!!


Ta-da....

here is my finished quilt top! I was very pleased with the way the half diamond and black fabric created my border and surrounded the quilt. 


I plan on bringing it to Show and Tell this morning at my LQS for our monthly "Strip Club" get together. 

I'm glad this project is pieced. Now I need to go shopping for more black and white fabric! Aw...the tragedies of quilting!

Now...on to other things.

Since it is Mardi Gras season I thought a King Cake recipe would be appropriate. Mardi Gras is one thing I do miss about living in Louisiana. It's such a fun and happy time!

My niece, Angela, sent me this recipe named

As Close As You Will Get To A Louisiana King Cake Outside of Louisiana King Cake Recipe

or I'll just call 

 Mardi Gras King Cake Recipe


Ingredients: (makes two cakes)
Pastry:
1 cup milk
1/4 cup butter
2 (.25 ounce) packages active dry yeast
2/3 cup warm water (110 degrees F)
1/2 cup white sugar
2 eggs
1 1/2 teaspoons salt
1/2 teaspoon nutmeg
5 1/2 cups All Purpose flour

Filling:
1 cup packed brown sugar
1 tablespoon ground cinnamon
2/3 cup chopped pecans
1/2 cup All Purpose flour
1/2 cup raisins
1/2 cup melted butter

Frosting:
1 cup confectioner's sugar
1 tablespoon water
Green, yellow, purple food coloring

Directions:
Scald milk and remove from heat. Stir in 1/4 cup butter. Allow mixture to cool to room temperature. In a large bowl dissolve yeast in the warm water with 1 tablespoon of the white sugar. Let stand until creamy, about 10 minutes.

When yeast mixture is bubbling, add the cooled milk mixture, whisk in the eggs, stir in remaining white sugar, salt, and nutmeg. Beat the flour into the milk/egg mixture 1 cup at a time. When the dough has pulled together, turn it out onto a lightly floured surface and kneed until smooth and elastic, about 8 - 10 minutes.

Lightly oil a large bowl and place the dough in the bowl turning to coat dough with oil. Cover with a damp cloth or plastic wrap and let rise in a warm place until doubled in size, about 2 hours. Punch down and divide dough in half.

Preheat oven to 375 degrees F. Grease 2 cookie sheets or line with parchment paper.

Filling: 
Combine brown sugar, ground cinnamon, chopped pecans, 1/2 cup flour and 1/2 cup raisins. Pour 1/2 cup melted butter over the cinnamon mixture and mix until crumbly.

(Cream cheese and/or fruit pie filling with the pecans, cinnamon and brown sugar also makes an excellent filling and is very popular in the New Orleans area)

Putting it all together:
Roll dough halves out into large rectangles approximately 10 x 16 inches. Sprinkle (or smear in the case of cream cheese) filling evenly over the dough and roll up each half tightly like a jelly roll, beginning at the wide side. Bring the ends of each roll together to form 2 oval shaped rings. Place each ring on a the prepared cookie sheet. With scissors make cuts 1/3 of the way through the rings at 1 inch intervals. Let rise in a warm place until doubled in size, about 45 minutes.

Bake in preheated oven for 30 minutes. Frost while warm with the confectioner's sugar blended with 1 to 2 tablespoons of water and food dye. Also can be sprinkled with colored sugar if desired.

Enjoy!

If you want to know more about the history of the King Cake, click here to read this short article.

Thanks for stopping by and I love to read your comments!

Happy Living! Happy Quilting!